
crosley turntable instruction manual
Welcome to the Crosley Turntable Instruction Manual! This guide provides comprehensive instructions for setting up‚ operating‚ and maintaining your turntable․ It ensures optimal performance and longevity․ Read carefully to understand safety precautions‚ features‚ and troubleshooting tips․ Follow the steps to enjoy your vinyl collection with clarity and precision․
1․1 Overview of the Manual’s Purpose and Structure
This manual is designed to guide you through the setup‚ operation‚ and maintenance of your Crosley turntable․ It outlines essential safety precautions‚ step-by-step instructions‚ and troubleshooting tips to ensure optimal performance․ The manual is divided into clear sections‚ covering unboxing‚ component identification‚ and advanced features like Bluetooth and USB connectivity․ By following this guide‚ you’ll be able to enjoy your vinyl collection with clarity and precision while extending the life of your turntable․
1․2 Importance of Reading the Manual for Optimal Use
Reading this manual is crucial for safe and effective use of your Crosley turntable․ It provides essential information on setup‚ operation‚ and maintenance‚ ensuring optimal performance and sound quality․ Proper understanding of the instructions helps prevent damage to both the turntable and your vinyl records․ Additionally‚ the manual offers troubleshooting solutions for common issues‚ enhancing your overall listening experience․ By following the guidelines‚ you’ll maximize the longevity of your Crosley turntable and enjoy your music collection with confidence․

Safety Precautions and Setup Guidelines
Ensure safe operation by keeping the turntable away from water and placing it on a stable‚ flat surface․ Always follow power source guidelines and avoid overloading․
2․1 General Safety Instructions for Handling the Turntable
Always handle the turntable with care to avoid damage․ Keep it away from water and moisture to prevent electrical hazards․ Ensure the power source matches the specifications․ Never touch electrical components with wet hands․ Avoid placing heavy objects on the turntable․ Use gentle force when moving or adjusting parts․ Unplug the device before cleaning or servicing․ Store in a cool‚ dry environment․ Do not expose the turntable to extreme temperatures or humidity․ Follow these guidelines to ensure safe and optimal operation․
Regularly inspect for wear and tear․ Keep out of reach of children and pets to avoid accidental damage or injury․
2․2 Operating Environment and Power Source Requirements
Use the Crosley turntable in a stable‚ dry environment․ Ensure the power source matches the specified voltage and type․ Avoid exposure to extreme temperatures‚ humidity‚ or direct sunlight․ Keep the turntable away from heating vents or radiators․ Do not operate near water or in damp conditions․ Maintain a consistent room temperature between 65°F and 75°F (18°C to 24°C)․ Ensure proper ventilation to prevent overheating․ Plug directly into a grounded electrical outlet․
Refer to the manual for specific power requirements to ensure safe and optimal performance․
2․3 Proper Placement and Handling of the Turntable
Place the Crosley turntable on a flat‚ stable‚ and dry surface․ Avoid direct sunlight and ensure the area is free from water or moisture․ Always handle the turntable with care‚ as it contains sensitive components․ Never stack records on the platter or apply excessive force․ Lift the turntable by the edges‚ not the tonearm or platter․ Keep it away from heating vents or radiators to prevent overheating․ Ensure the power source is correct and avoid exposure to extreme temperatures or humidity for optimal performance․

Unboxing and Initial Setup
Unbox your Crosley turntable carefully‚ ensuring all components are included․ Place it on a flat surface‚ plug in the power‚ and refer to the manual for setup․
3․1 What’s Included in the Box
Inside the box‚ you’ll find the Crosley turntable‚ a stylus‚ power cable‚ and RCA audio cables․ Models like the Crosley Cruiser CR8005 and CR8005F include a USB port for digitizing vinyl․ Some versions come with Bluetooth connectivity for wireless streaming․ Check for additional accessories like a dust cover or adapter․ Ensure all components are present before setup․ Refer to the manual for specific inclusions‚ as contents may vary by model; Properly unpack and organize items to begin your vinyl journey smoothly and efficiently․
3․2 Step-by-Step Setup Instructions
Carefully unpack the turntable and contents․ Ensure all items are included․ 2․ Place the turntable on a stable‚ flat surface away from direct sunlight and moisture․ 3․ Plug in the power cable and ensure proper connectivity․ 4․ Connect the RCA audio cables to a speaker or amplifier if needed․ 5․ For USB or Bluetooth models‚ install the provided drivers or pair your device․ 6․ Gently lift the tonearm and place it on the record groove․ 7․ Adjust the volume and enjoy your vinyl․ Refer to the manual for model-specific instructions and additional features․
Components and Features of the Crosley Turntable
The Crosley turntable features a sturdy platter‚ tonearm‚ and cartridge for precise playback․ It includes a built-in preamp‚ RCA outputs‚ and Bluetooth/USB connectivity for modern convenience․ Additional features like adjustable tracking force and a dust cover enhance usability and protection‚ ensuring high-quality sound and durability for vinyl enthusiasts․
4․1 Overview of External Components
The Crosley turntable features a sleek‚ durable design with a sturdy platter and a balanced tonearm․ The external components include a high-quality cartridge‚ a motor with adjustable speed settings‚ and a user-friendly control panel․ You’ll also find a dust cover to protect the turntable when not in use․ Additionally‚ it comes with built-in speakers‚ RCA output ports‚ and a USB connection for digital recording․ These components ensure smooth operation and high-quality sound reproduction‚ making it easy to enjoy your vinyl collection with precision and clarity․
4․2 Understanding the Internal Mechanisms
The Crosley turntable’s internal mechanisms are designed for smooth and precise playback․ The motor drives the platter‚ ensuring consistent rotation‚ while the belt system reduces vibrations․ The tonearm’s bearings allow for smooth movement‚ and the cartridge captures the grooves of the record․ These components work together to deliver clear and detailed sound․ Understanding these internal mechanisms helps you appreciate the engineering behind your turntable and ensures optimal performance․ Regular maintenance‚ like cleaning the stylus and checking the belt‚ is crucial for longevity․ Proper care of these parts guarantees high-quality sound reproduction for years to come․
Operating the Crosley Turntable
Place the record on the platter‚ lift the tonearm‚ and gently lower it onto the record․ Adjust volume and enjoy․ Use Bluetooth for wireless streaming․
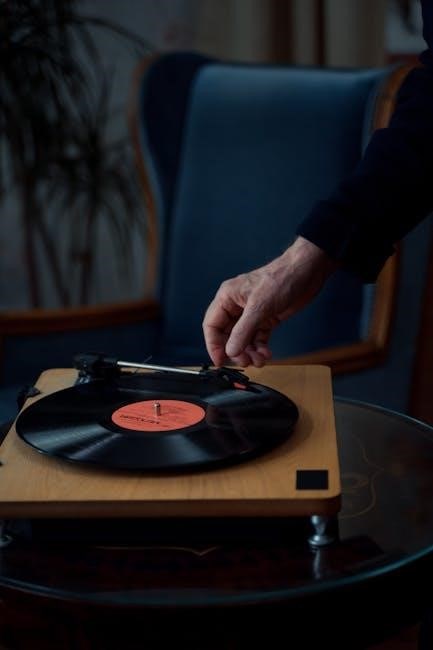
5․1 Playing Vinyl Records: A Step-by-Step Guide
Ensure the turntable is on a flat‚ stable surface․ Clean the record with a soft cloth to remove dust․ Place the record on the platter‚ aligning the spindle hole․
Gently lift the tonearm and position the stylus at the record’s edge․ Start the motor using the power button or switch․
Adjust the volume to your preference․ For Bluetooth models‚ pair with external speakers if desired․
After the record ends‚ carefully lift the tonearm and return it to its rest․ Store the record in its sleeve to prevent damage․
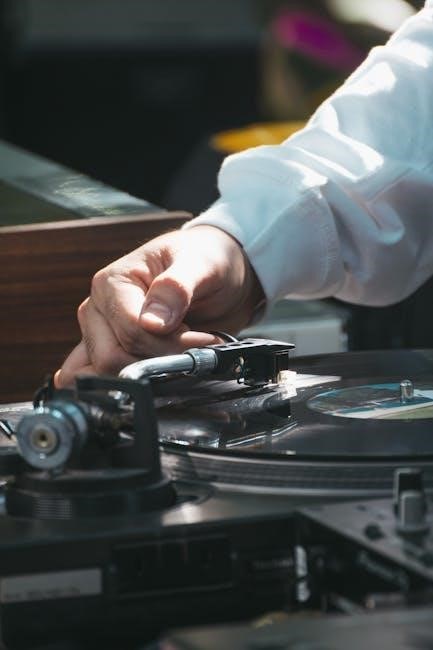
5․2 Adjusting the Tonearm and Tracking Force
Properly adjusting the tonearm and tracking force ensures optimal sound quality and prevents record damage․ Locate the counterweight on the tonearm and gently slide it until the arm balances evenly․ Use the tracking force gauge to set the recommended force (usually 1-3 grams)․ Play a record to test the sound‚ ensuring the needle doesn’t skip or dig into the grooves․ Fine-tune the counterweight as needed for clear playback․ Avoid over-tightening‚ as this can damage the mechanism․ Always refer to your specific model’s manual for precise instructions․
5․3 Using Additional Features (Bluetooth‚ USB‚ etc․)
To enhance your listening experience‚ utilize the Crosley turntable’s additional features․ For Bluetooth connectivity‚ pair your device by pressing the Bluetooth button until it flashes‚ then select the turntable from your device’s settings․ Use the USB port to digitize your vinyl records by connecting to a computer․ Ensure the phono preamp is enabled for proper sound output․ Experiment with equalizer settings for customized sound․ For optimal performance‚ keep the turntable updated with the latest firmware; Refer to the manual for specific instructions on activating and troubleshooting these features․
Troubleshooting Common Issues
Identify and resolve common problems like power issues‚ skipping‚ or distortion․ Consult the manual for diagnostic steps and solutions․ Refer to specific sections for detailed guidance․
6․1 Diagnosing and Resolving Power Issues
If your Crosley turntable isn’t powering on‚ ensure it’s properly plugged into a working outlet․ Check for blown fuses or tripped circuit breakers․ Verify the power cord isn’t damaged․ If using a USB-C connection‚ ensure the cable is securely connected․ Consult the manual for specific reset procedures․ If issues persist‚ contact customer support or consider professional assistance․ Always prioritize safety when troubleshooting electrical components․
6․2 Addressing Skipping or Distortion Problems
Skipping or distortion on your Crosley turntable can often be resolved by adjusting the tracking force or ensuring the stylus is clean․ Check if the record is warped or dirty‚ as this can cause playback issues․ Verify the turntable is placed on a level surface and away from speakers to avoid feedback․ If distortion persists‚ consider upgrading the stylus or cartridge․ Ensure all connections are secure and free from interference․ Regular maintenance‚ like cleaning the stylus and records‚ can prevent such problems and enhance sound quality․
6․3 Advanced Troubleshooting Techniques
For persistent issues‚ inspect the turntable’s internal mechanisms and electrical components․ Check for loose connections or damaged wiring․ Ensure the motor is functioning correctly and the belt (if applicable) is properly aligned; Clean or replace the stylus if worn‚ and verify the cartridge is securely mounted․ Adjust the counterweight to optimize tracking force‚ and ensure the tonearm is balanced․ If distortion persists‚ consider upgrading to a higher-quality cartridge or consulting a professional technician․ Advanced users may also explore recalibrating the phono preamp or checking for firmware updates (if applicable)․ Always refer to the manual for specific guidance․

Maintenance and Care for Longevity
Regularly clean the turntable and stylus to prevent dust buildup․ Store records upright in sleeves to avoid warping; Check for worn parts like the belt or cartridge and replace as needed to ensure optimal sound quality and extend the life of your Crosley turntable․
7․1 Cleaning the Turntable and Stylus
Regular cleaning is essential for maintaining sound quality and prolonging the life of your Crosley turntable․ Use a soft‚ dry cloth to wipe the turntable surface‚ removing dust and debris․ For the stylus‚ gently brush with a carbon fiber stylus brush to eliminate dirt and residue․ Avoid using harsh chemicals or liquids‚ as they may damage the components․ Clean the stylus after every use to prevent dust buildup and ensure accurate tracking․ Regular maintenance ensures optimal performance and protects your vinyl records from damage․ Inspect the stylus periodically for wear and replace it if necessary․
7․2 Proper Storage of Records and Accessories
Store your vinyl records upright in a cool‚ dry place‚ away from direct sunlight and heat sources․ Handle records by the edges to prevent oil from fingerprints damaging the surface․ Use protective sleeves to shield records from dust and scratches․ Keep accessories like the stylus‚ cables‚ and adapters in a secure‚ dry location․ Avoid stacking records or placing heavy objects on them․ Store the turntable in its original packaging or a protective case when not in use to prevent damage․ Proper storage ensures your collection remains in excellent condition for years of enjoyment․
7․3 Upgrading or Replacing Parts
To enhance performance‚ consider upgrading your Crosley turntable with a high-quality stylus or cartridge‚ such as the Ortofon 2M Blue‚ for improved sound clarity․ Replace worn or damaged parts promptly to maintain optimal functionality․ Avoid using low-quality replacements‚ as they may degrade sound quality or damage the turntable․ Always consult the manual or contact Crosley support before making modifications․ Upgrading carefully ensures your turntable continues to deliver exceptional audio and extends its lifespan; Proper maintenance and thoughtful upgrades will keep your Crosley performing at its best for years to come․
Congratulations! You’re now ready to enjoy your Crosley turntable fully․ Regular maintenance and proper care will ensure years of exceptional sound quality․ Explore additional resources for further learning and enhancement of your vinyl experience․ Happy listening!
8․1 Best Practices for Enjoying Your Crosley Turntable
To maximize your Crosley turntable experience‚ use high-quality cartridges and avoid overloading the tonearm․ Regularly clean the stylus and records to prevent dust buildup․ Store records upright in a cool‚ dry place to maintain condition․ For better sound‚ connect external speakers with higher fidelity․ Avoid stacking records to prevent warping and damage․ Finally‚ balance the tonearm properly to ensure smooth playback and reduce wear on your vinyl collection․
8․2 Additional Resources for Further Learning
For deeper understanding‚ explore digital manuals for specific models like the Crosley Cruiser or Portfolio․ Watch tutorials on YouTube for setup and maintenance․ Visit forums or audiophile communities to share tips and learn from experts․ Check reviews for accessories like phono preamps or high-quality cartridges․ Finally‚ refer to vinyl care guides to protect your records and extend their lifespan․ These resources will help you master your Crosley turntable and enhance your vinyl listening experience․